

Crunches
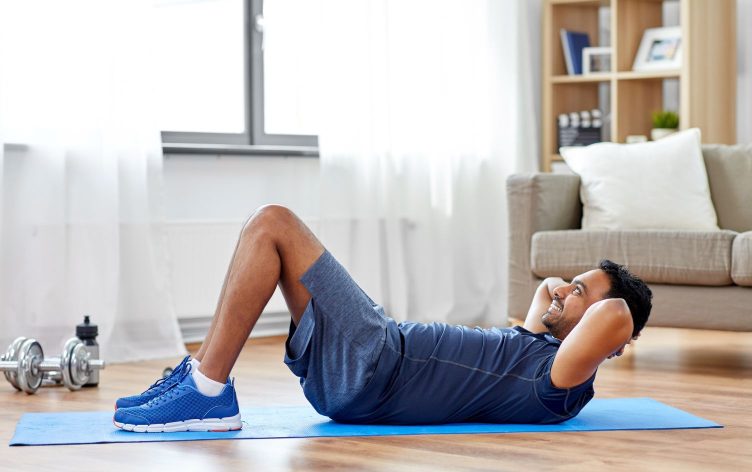
Crunches are tempting since they’re easy. Crunches are perfect for home workouts since they don’t require equipment or a gym membership. Simply lie on a yoga mat on the floor to begin.
Start a simple crunch by lying on your back with your knees bent and feet flat. Place your hands behind your head or across your chest, whichever is most comfortable. Draw your navel to your spine to engage your core muscles, then slowly elevate your head, neck, and shoulders. Avoid back pain by pressing your lower back into the floor.
Contract your abdominal muscles and pull your upper body to your knees as you exhale. Instead of tugging on your neck or utilizing momentum, crunch with your abs. After reaching the peak, clench your abs and slowly return your upper body to the beginning position.
Avoid hurrying through crunches to enhance their efficacy. Quality over quantity and good technique for each repetition will prevent damage and maximize outcomes. Adding variants of the fundamental crunch, such bicycle or reverse crunches, can target other abdominal muscle groups for a more complete exercise.
Crunches are great for abs because of their ease, efficacy, and other benefits. First, they increase core stability and posture, which improves balance and coordination. Crunches can also contour and tone the midsection by targeting the rectus abdominis, obliques, and deeper core muscles.
Crunches are ideal for all ages and abilities since they can be customized to meet different fitness levels and goals. Crunches are a demanding but manageable workout for beginners and seasoned athletes alike.
Bicycle Crunches
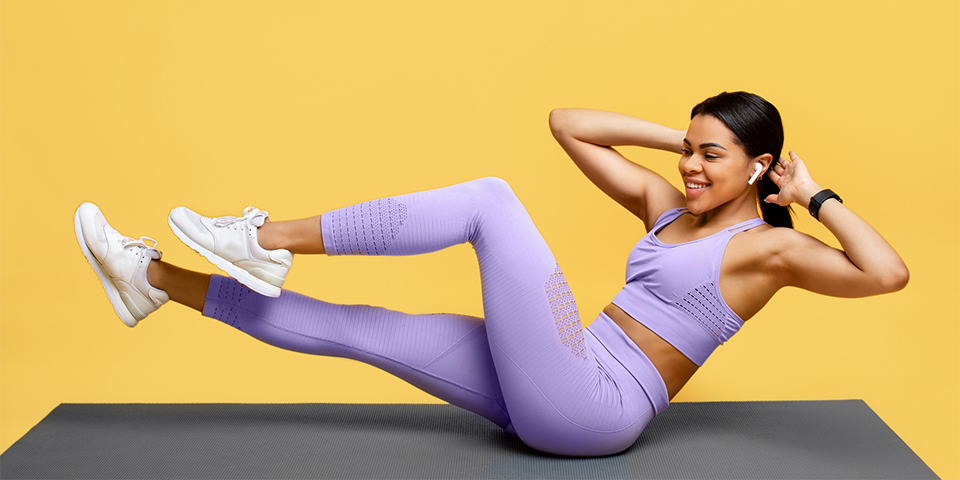
Their simplicity and effectiveness make bicycle crunches beautiful. Lie on a level surface to do them without extra equipment. They are ideal for home training if gym equipment is unavailable. Bicycle crunches train your core by engaging your rectus abdominis, obliques, and hip flexors with body weight resistance.
Start bicycle crunches by lying flat on your back with your hands behind your head and elbows out. Engage your core and lift your shoulders. Exhale and bring your right elbow to your left knee while straightening your right leg like a bike. Switch sides, bringing your left elbow to your right knee and straightening your left leg. Each time you switch sides, engage your core muscles and move smoothly.
Bicycle crunches target the obliques more due to the twisting motion. Rotation engages more core muscles, improving balance and definition. Bicycle crunches are also cardiovascular since they keep your heart rate up. This works your core, burns calories, and improves fitness.
Scalability is another benefit of bicycle crunches. Adjust the intensity to your fitness level–beginner or advanced athlete. Beginners may decrease reps to learn the form before progressively increasing them. Advanced practitioners might increase weight or lengthen repetitions to challenge the workout.
Bicycle crunches are utilitarian as well as attractive. Proper posture, lower back pain prevention, and daily mobility require a strong core. Strengthening your spine and pelvic muscles improves stability and reduces injury risk in sports and daily life.
Bicycle crunches are easy and quick to incorporate into your home workout. You may do them anytime, anyplace, without equipment or a gym membership. Bicycle crunches help you stick to your fitness objectives without making excuses, whether you have a few minutes in the morning or prefer to work out around lunch.
Maintaining good technique when doing bicycle crunches maximizes their effects. Avoid tugging on your neck or swinging your legs. Instead, activate your abdominal muscles with controlled motions and complete range of motion. To stimulate your deep core muscles, breathe evenly and exhale as you crunch, pulling your navel toward your spine.
Plank
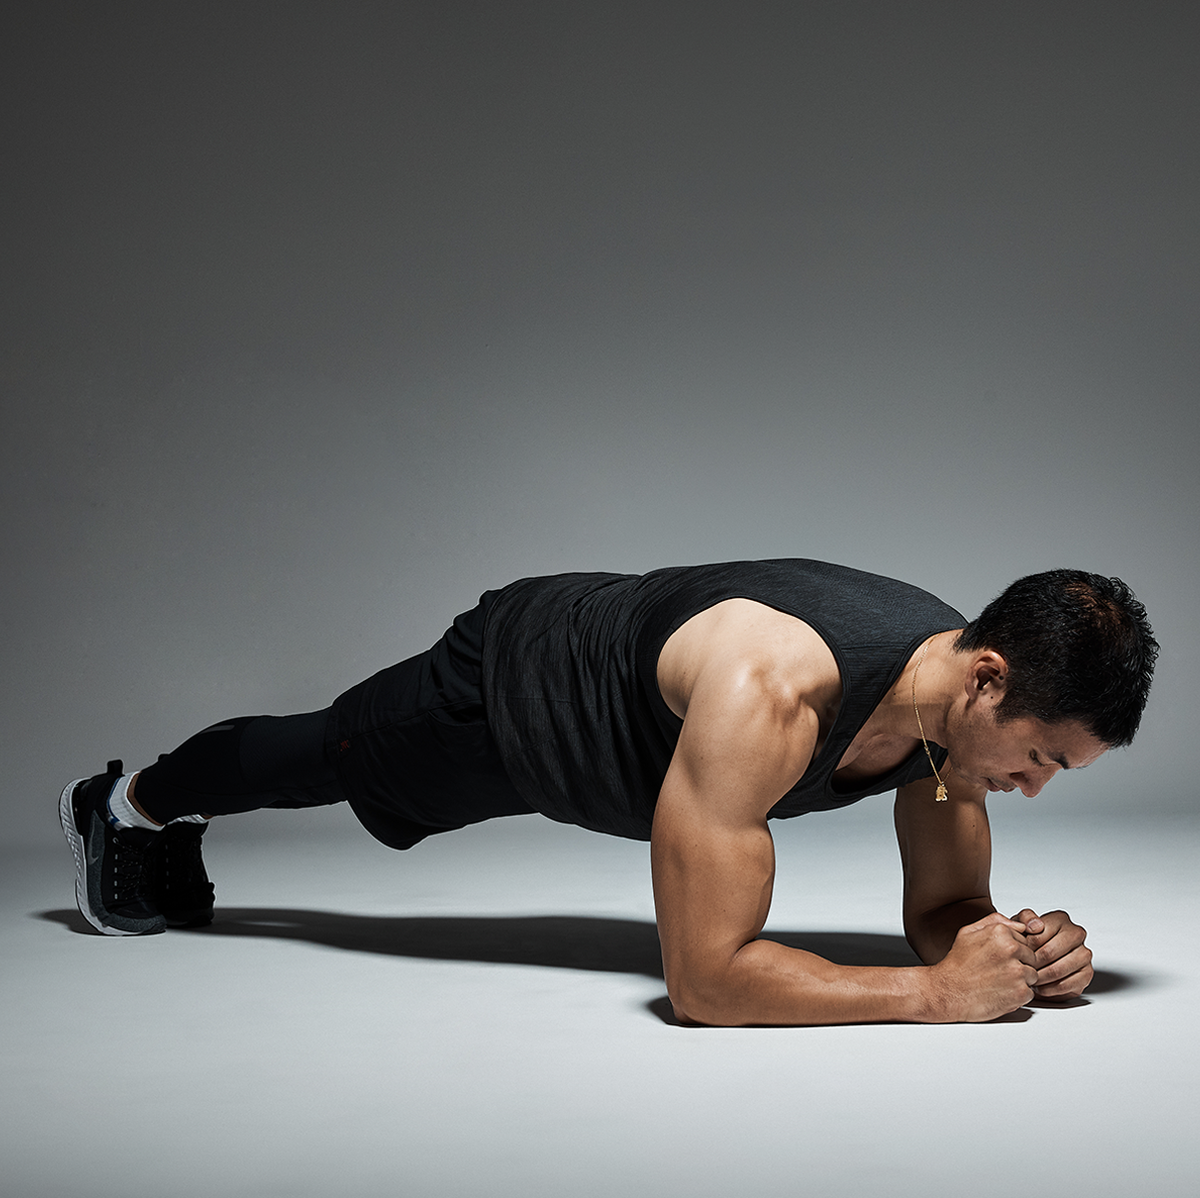
Essentially, the plank is a static exercise that targets the abdominal muscles, including the rectus, transverse, and obliques. It also works the shoulders, back, and glutes, giving it a full-body exercise.
Its simplicity makes the plank beautiful. To plank, start with a push-up with your hands shoulder-width apart and your body straight from head to heels. Pull your belly button toward your spine and tighten your abs. Stay in this posture as long as possible, maintaining good form and alignment.
Plank flexibility is a major feature. The forearm plank is popular, but there are several variants to keep your exercises interesting. Oblique muscles are targeted in side planks, improving core stability and definition. To vary your practice and target different muscle groups, try the high plank, low plank, plank with leg lifts, and plank with shoulder taps.
Any training regimen, including the plank, requires consistency to achieve benefits. Include the plank in your workouts and progressively increase the duration and intensity of your holds to improve strength and endurance. Combine the plank with crunches, bicycling, and leg lifts for a complete core-strengthening regimen.
Moreover, the plank is really convenient. Planks may be done anywhere and anytime, unlike other ab workouts that need equipment or gym subscriptions. Planking requires just a little floor space at home, work, or on the go. Its accessibility makes it great for those who want to stay healthy without pricey equipment or gym subscriptions.
In addition to physical advantages, the plank improves attention, concentration, and awareness. You must endure pain and effort to retain perfect form while holding a plank. Your mental resilience and resolve will develop as well as your physical strength.
Mountain Climbers
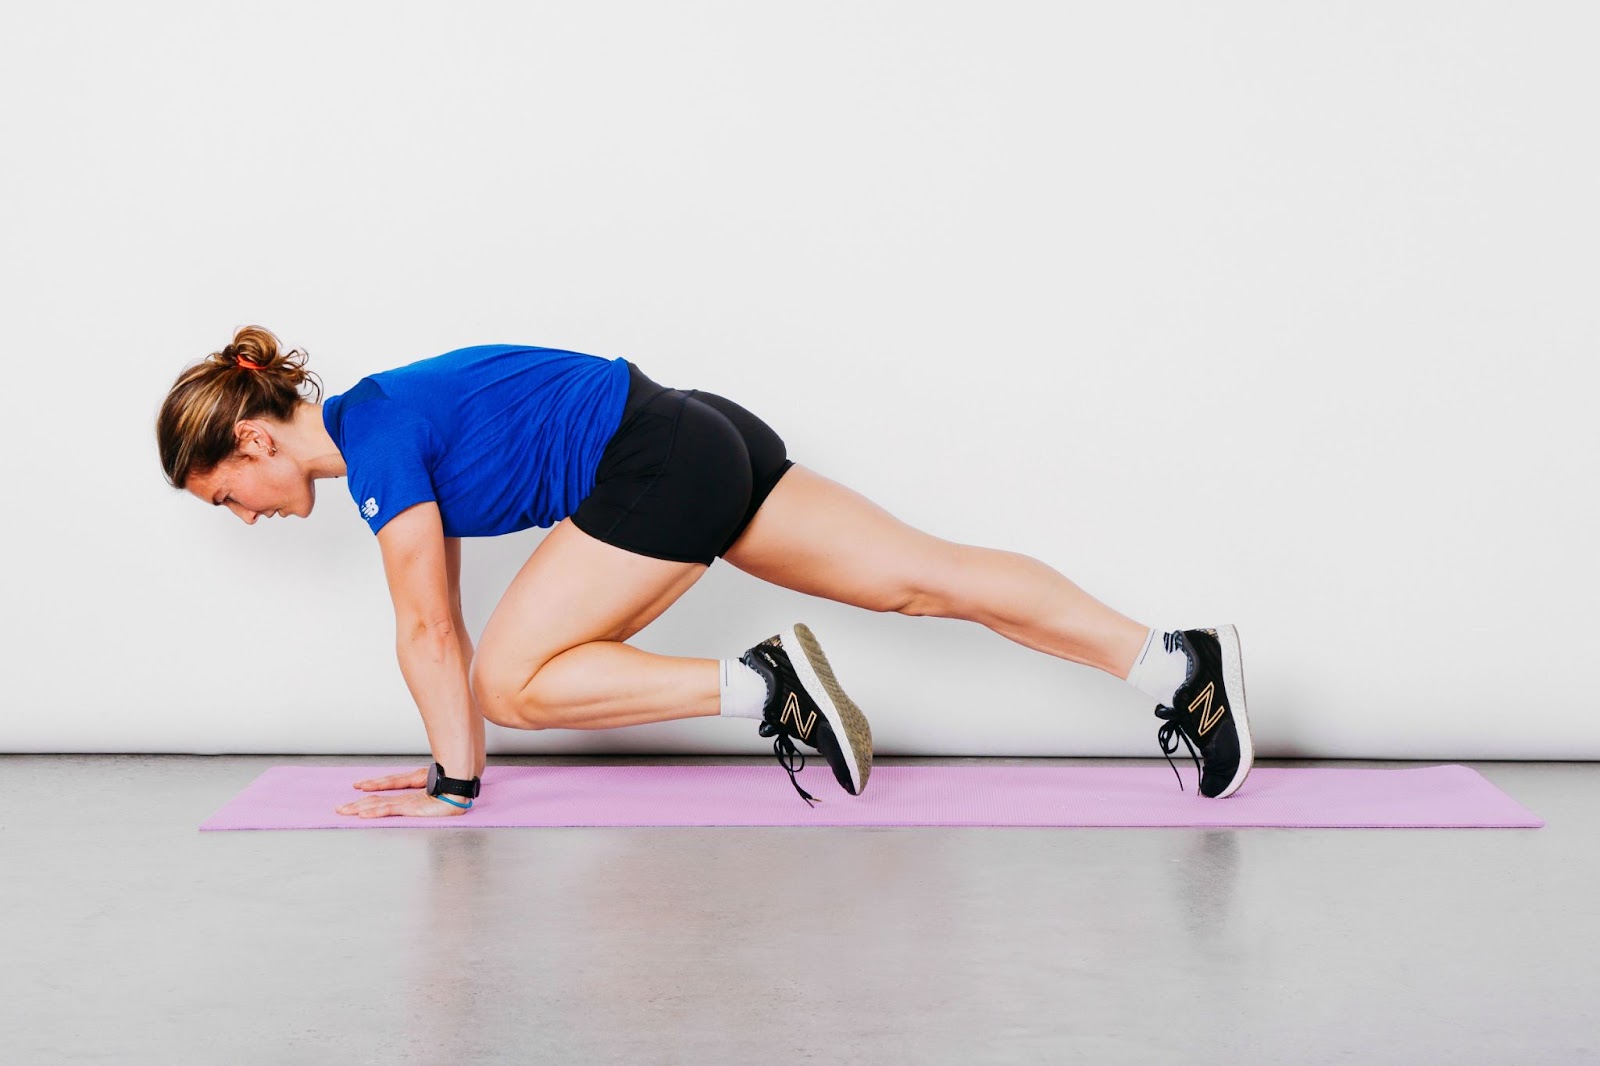
Mountain climbers are unique home exercises since they challenge the heart and tone the core. You’ll burn calories and strengthen abs, obliques, shoulders, chest, and leg strength and endurance. It’s like getting many advantages in one workout, making it ideal for busy people.
Mountain climbers have basic mechanics. Start in a plank with your hands behind your shoulders and your body straight from head to heels. Use your core to stabilize. Start by raising one knee to your chest, then swiftly swap legs, as if racing horizontally. To enhance workout efficacy, keep your hips low and pace consistent.
Adaptability makes mountain climbers one of the greatest abdominal workouts at home without equipment. No matter your fitness level, you can easily alter this exercise’s intensity. Beginning with slower, regulated motions, beginners may increase pace and duration as they acquire strength and stamina. Add cross-body mountain climbers or push-ups between reps to increase difficulty and ensure consistent growth and results.
Mountain climbers also fit in small spaces, making them excellent for home training. You may find a location for this workout in a large living room or a small apartment. Just enough space to extend into a plank posture makes it accessible to almost everyone, regardless of living situation.
Another benefit of mountain climbers is their training variety. Use them in circuit training, HIIT, or as a warm-up or finisher for your normal exercises. Mountain climbers can be used with squats, lunges, and burpees to engage several muscle groups efficiently.
Mountain climbers provide utilitarian fitness beyond looks. These workouts increase athleticism and lessen everyday injury risk by exercising core muscles and increasing stability. A strong core is vital for optimal posture and movement mechanics while carrying groceries, playing sports, or doing daily duties.
Mountaineers have mental and physical benefits. You can meditate and reduce tension by focusing on your motions with the rhythmic, repetitive workout. The sensation of success from completing difficult mountain climbs might also motivate you to stay to your workout program.
Any fitness regimen needs consistency to work. Mountain climbers should be added to your home workout regimen two to three times a week, gradually increasing intensity and length. Listen to your body and adjust the activity to avoid overexertion or injury.
Russian Twists
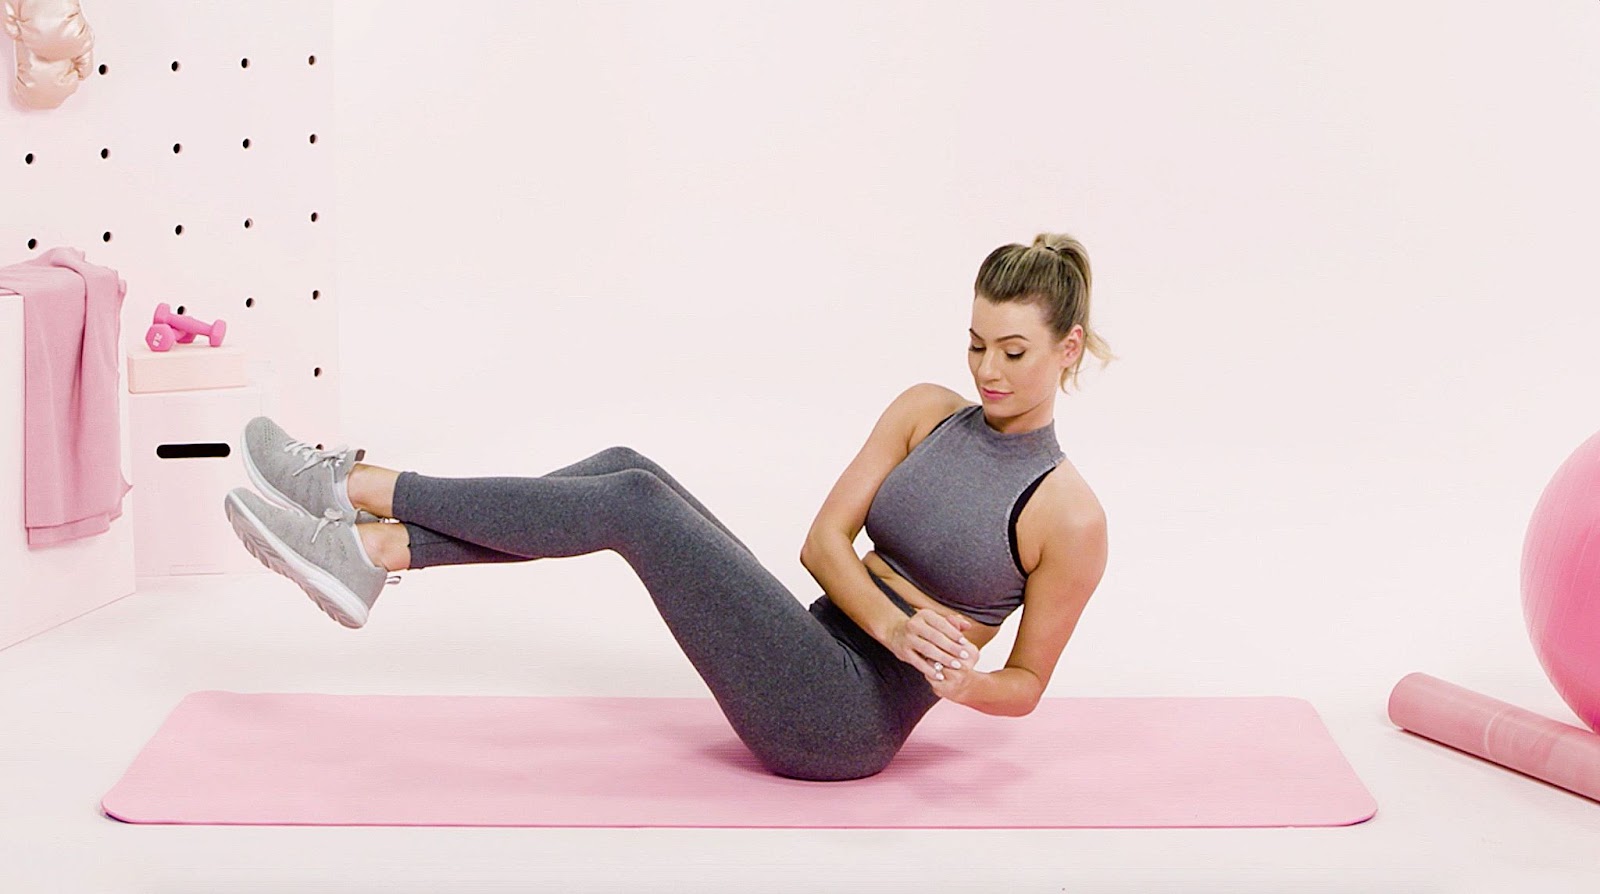
Sit on the floor with bent knees and flat feet to execute Russian twists. Lean back to engage your core and elevate your feet so you balance on your glutes. Keep your back straight and chest raised throughout the exercise for correct technique.
Hold a weight or clasp your hands in front of you to enhance emphasis. Start by turning your body right and placing your clasped hands or weight on the floor beside your hip. Keep your core engaged and movements controlled.
After reaching your right range of motion, swivel your torso left and touch the floor beside your left hip with your hands or weight. This repeats once.
Alternate side twists for the required reps or duration. To maximise workout efficacy, move slowly and carefully.
Russian twists are one of the greatest abdominal workouts at home without equipment since they target numerous muscle groups. They work your rectus abdominis, which gives you the “six-pack” appearance, and your obliques, which are needed for lateral motions and core stability.
Russian twists strengthen your lower back and hip flexors to stabilize your body, providing a complete core exercise without equipment.
Versatility is another Russian twist feature. You can complete the fundamental exercise with just your body weight, but carrying a weight or book makes it more difficult. This lets you stress your muscles as you gain strength without buying pricey equipment.
Russian twists enhance core strength and rotational mobility, which is important for sports and everyday motions like reaching for something or looking behind you while driving.
Russian twists are easy to incorporate into your exercise, whether you’re following a schedule or working out at home. They may be added to bodyweight circuits, HIIT workouts, or as a core finisher because they require little space and equipment.
Depending on your fitness level and goals, execute Russian twists 2-3 times per week for 10-20 repetitions or 30-60 seconds per side for best results. Prioritize form and control to avoid strain or damage.
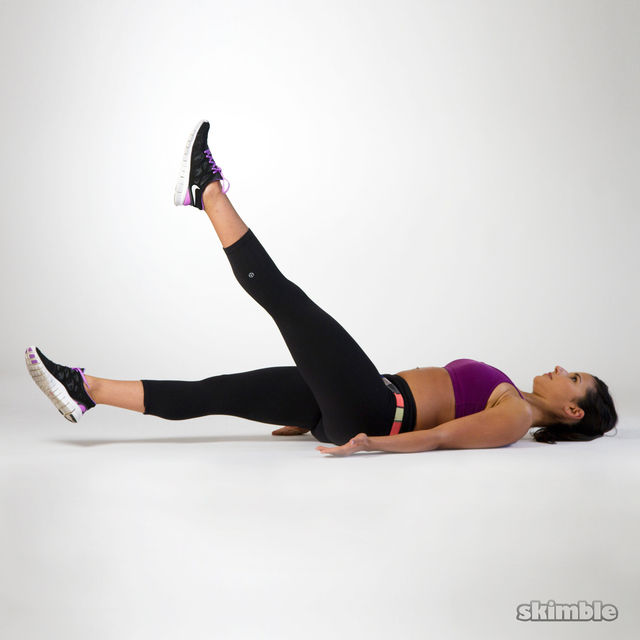
Leg Raises
Simple leg lifts are beautiful. You just need a yoga mat or living room floor to lie on. No need to buy pricey workout equipment or schedule extra gym time. Leg raises provide a great ab exercise at home anytime.
How do leg raises work, and why are they one of the finest ab workouts? The mechanics are simple. Leg raises begin with you lying flat on your back with your arms outstretched. Keep your legs straight and elevate them to the ceiling using your core muscles. After raising your legs as high as you can comfortably go, carefully return them to the beginning position without touching the ground.
Leg raises work because they focus on the lower abdominal muscles, which are hard to build. Lifting your legs against gravity works your lower abdominal muscles harder to regulate the movement. Over time, this can strengthen and define your lower abs, giving you that toned, sculpted look you want.
Leg lifts have additional advantages. It works the lower abs, hip flexors, and lower back, giving a complete core workout that improves stability and posture. Leg raises require no equipment, so you may tailor your exercise to your fitness level. Leg raises may be changed to suit your fitness level, whether you’re a novice or a fitness master seeking for a new challenge.
Versatility makes leg raises one of the finest abdominal workouts at home without equipment. Different leg raise variants may be added to your practice to keep things fresh and target different core muscles. To push your exercise, try hanging leg lifts with a pull-up bar or stability ball. So many ab exercise variants mean you’ll never get bored.
Leg lifts are easy, effective, and adaptable. They take up little room and equipment, so you can fit them into your hectic schedule, whether you have 10 minutes before work or want to workout over lunch. You can do them anywhere, so there’s no reason not to do them daily.
Like any workout, leg raises must be done properly to minimize injury and optimize benefits. Keep your lower back to the ground and don’t swing or elevate your legs with momentum. Use your core muscles and move carefully to maximize each rep.
Flutter Kicks
Flutter kicks are performed on your back with your arms at your sides or under your buttocks for assistance. Raise your legs a few inches, straightening them. Then, flap your legs like a freestyle swimmer. To support your lower back and maintain control, activate your core muscles throughout the exercise.
Flutter kicks target the lower abdominal muscles, which are hard to separate with other exercises, making it one of the finest abs workouts at home without equipment. Your lower abs will burn deeply during flutter kicks, suggesting proper engagement.
Flutter kicks are a dynamic workout that builds muscle, endurance, and coordination. Continuous kicking improves core stability by requiring core muscle control and coordination.
Versatility is another virtue of flutter kicks. Although they focus on abs, they also work hip flexors and quads. This gives your middle and lower body a complete workout without equipment.
Furthermore, flutter kicks may be easily adapted to different fitness levels. Beginners can start with slower kicks and develop speed and range as they acquire muscle and endurance. Advanced athletes may do flutter kicks longer or add them to HIIT exercises for a challenge.
Flutter kicks are easy to incorporate into home workouts. They take little space and no equipment, so you can do them in your living room, bedroom, or even outdoors. Plus, they may be readily coupled with other bodyweight exercises to engage several muscle groups.
Flutter kicks may strengthen and define your core if done correctly and regularly. Like any workout, good technique is crucial to minimize strain or damage. Keep your lower back down, engage your core, and minimize neck arching or straining.
Sit-Ups
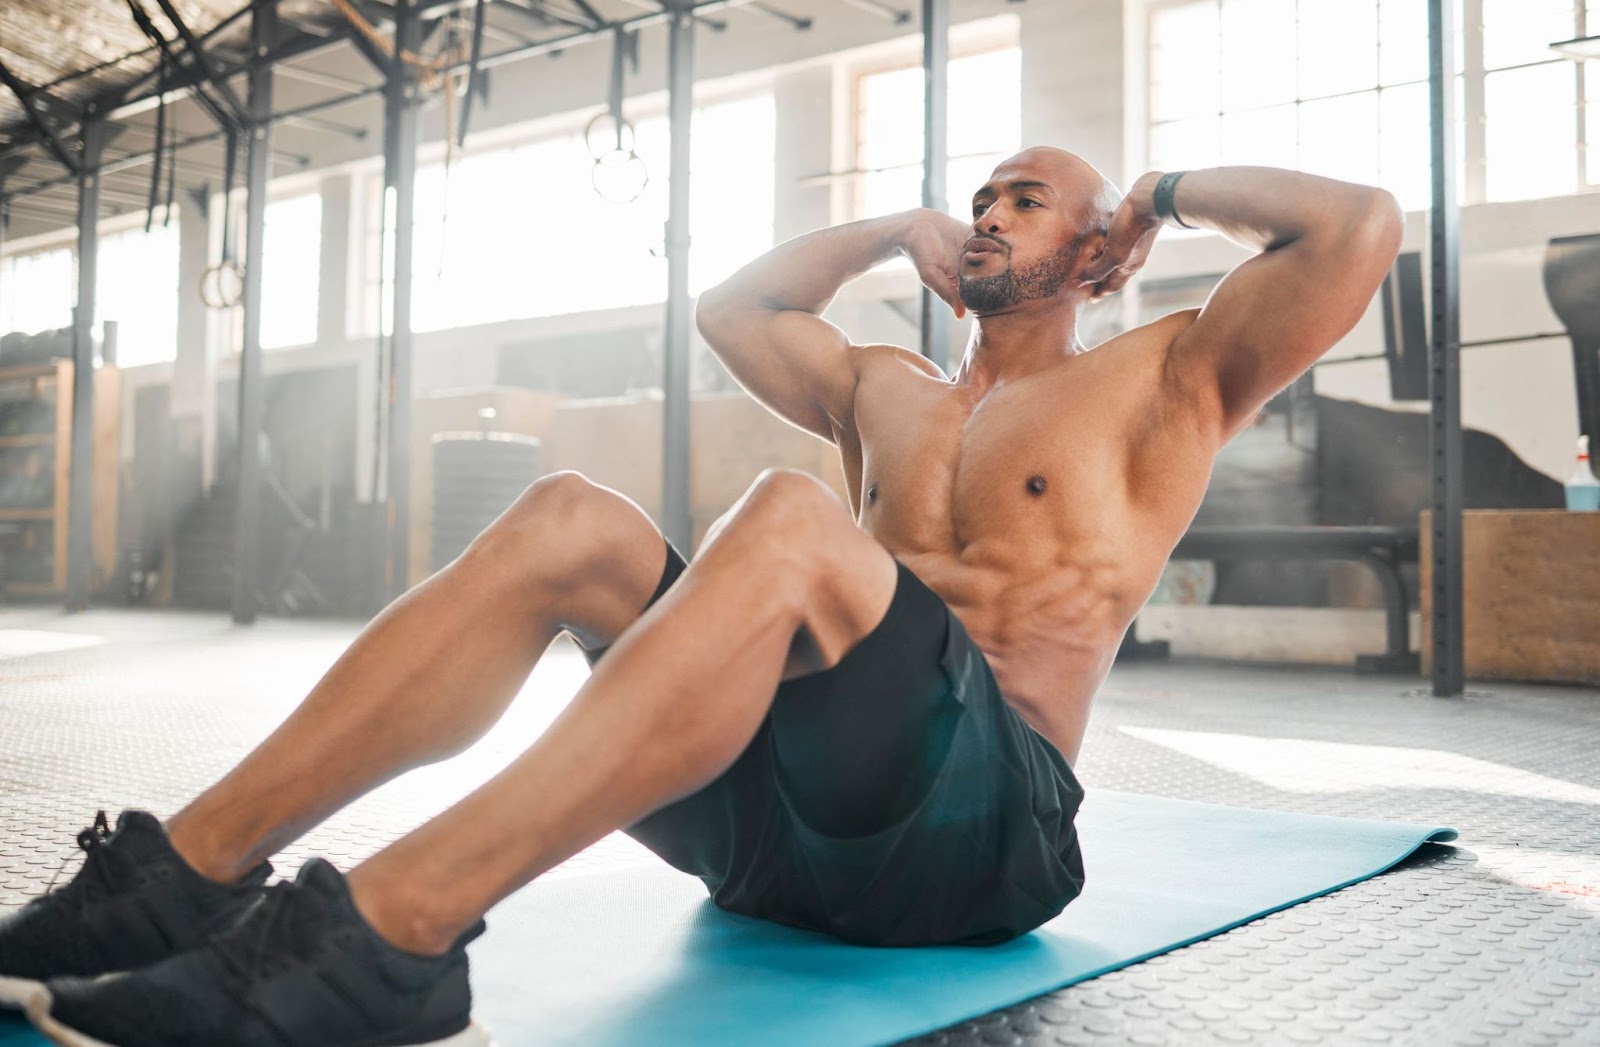
The sit-up targets the rectus abdominis, which flexes the spine and gives you a “six-pack” look. Beyond aesthetics, it has other benefits. Sit-ups strengthen the core, especially the obliques and hip flexors, which is vital for optimal posture, injury prevention, and sports performance.
Simple sit-ups are a great home workout. No gym membership or special equipment is needed—just a level surface. Sit ups may be done anywhere, anytime, in your living room, bedroom, or outdoors. This accessibility makes it easy to include sit-ups into your everyday routine, whether as part of a workout or during a commercial break.
Additionally, sit-ups may be simply changed for different fitness levels and goals. For greater resistance, expert practitioners can try straight-leg or weighted sit-ups. Beginners can start with the bent-knee version. To target various core areas and liven up your exercise, try Russian twists, bicycle crunches, and flutter kicks.
While strengthening the abdominal muscles, sit-ups also improve daily mobility. When tying your shoes, lifting groceries, or reaching for goods on a high shelf, a strong core helps maintain stability and reduce lower back discomfort. By doing sit-ups regularly, you’ll firm your stomach and increase your functional fitness and quality of life.
Sit-ups are also adaptive, letting you modify intensity to your fitness level and goals. To make the workout harder, add repetitions, pace, or pauses at the top or bottom. Sit-ups target the entire core more efficiently than crunches because they work various muscle groups.
Building a defined middle requires consistency. Sit-ups won’t give you six-pack abs overnight, but adding them to a workout that incorporates cardio, weight training, and diet will speed up the process. Focus on appropriate form, activating the core throughout the range of action, and avoiding neck and lower back strain.
Side Plank
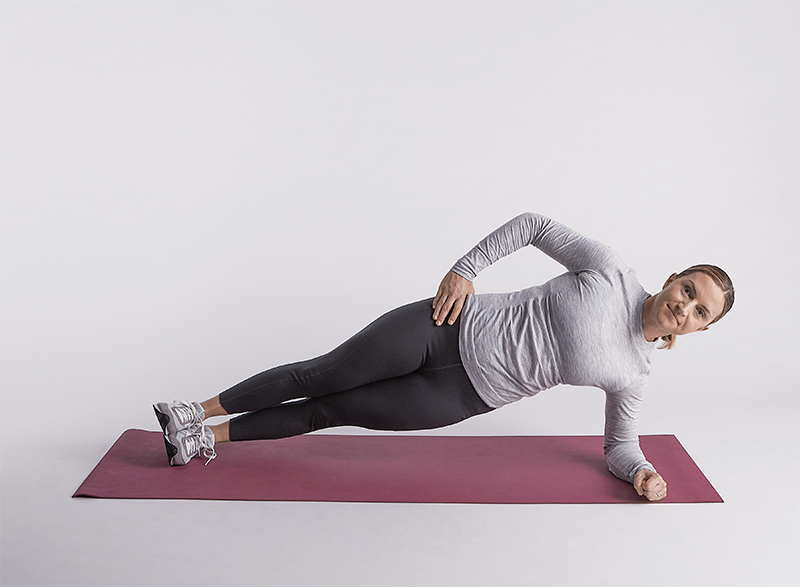
Start a side plank by lying on your side with your legs straight and stacked. Place your forearm precisely behind your shoulder and elevate your hips to make a straight line from head to heels. Hold this stance as long as possible while keeping form, then switch sides.
What distinguishes the side plank from other home ab exercises? First off, it’s versatile. The side plank may be modified for beginners and seasoned fitness enthusiasts. A simplified variation for beginners bends the knees and keeps the lower knee on the ground for support. As you gain stronger, you may switch to the straight-leg variant and add challenges like raising the upper leg or rotating.
Another reason the side plank is the best home workout is that it engages various muscle groups. To balance your body, it stimulates the rectus abdominis, transverse abdominis, and hip and shoulder muscles in addition to the obliques. Overall core stability and functional strength improve as you sculpt a stronger, more defined midsection.
The side plank has several uses beyond looks. Daily tasks like lifting groceries and maintaining posture require a strong core. You may improve your athletic performance, minimize your chance of injury, and relieve lower back discomfort by adding the side plank to your home training program.
Accessibility makes the side plank desirable. It works with just a little floor space and your body weight. This makes it ideal for home workouts or those without gym equipment.
Besides physical benefits, the side plank has mental ones. Holding a difficult static posture like the side plank demands mental fortitude and attention, helping you overcome challenges. As you build strength and endurance, you’ll feel more confident in the gym and outside.
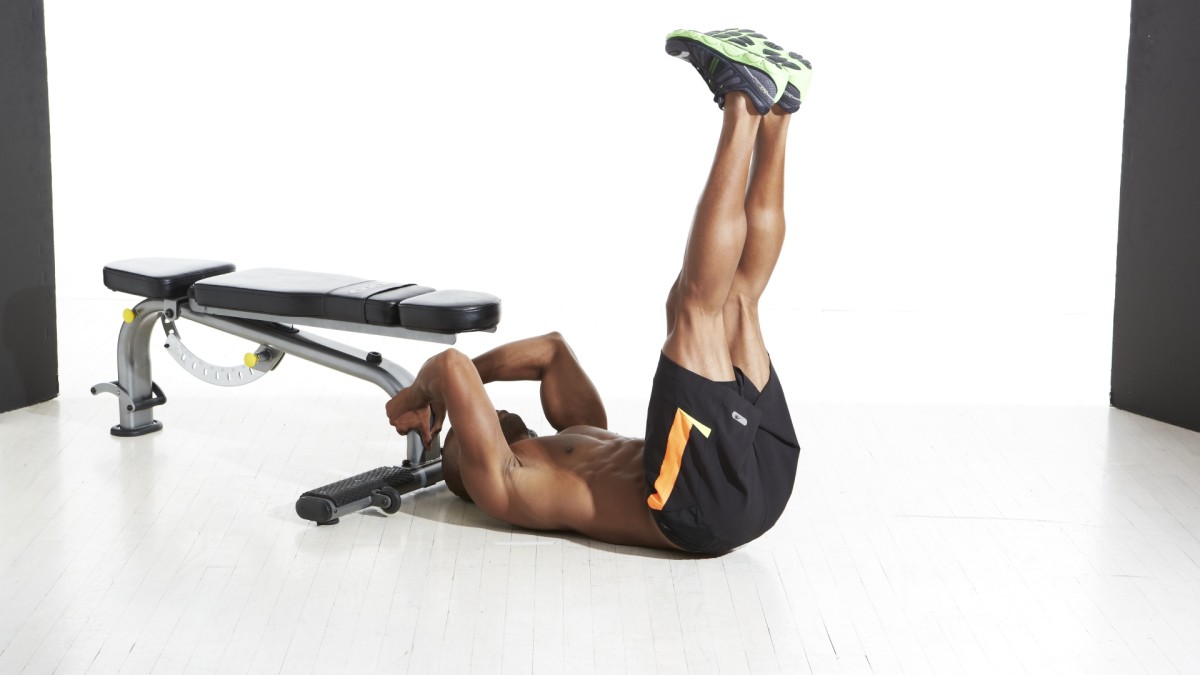
Reverse Crunches
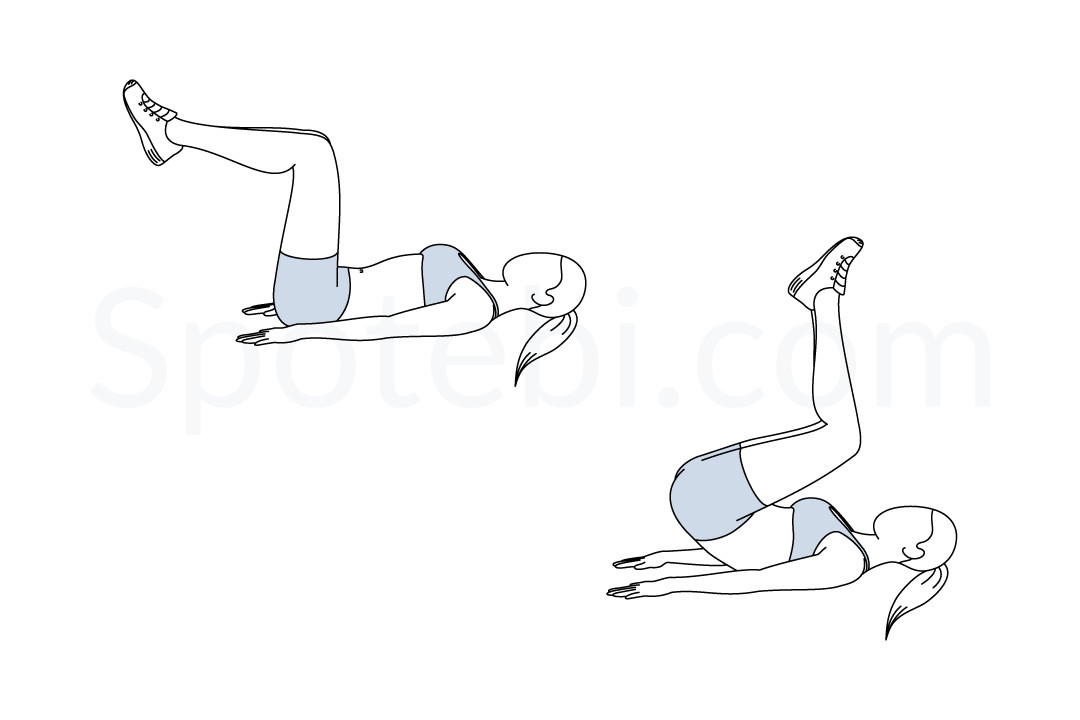
What are reverse crunches? Reverse crunches elevate your pelvis and lower torso off the ground to your chest, unlike typical crunches. Conventional workouts seldom target the lower abdominals, but this movement does. These muscles may be strengthened with reverse crunches, improving core stability and midsection tone.
Due to their simplicity and adaptability, reverse crunches are great for home training without equipment. Simply lie on a yoga mat or carpeted floor and you’re ready. This makes reverse crunches easy to accomplish in your living room, bedroom, or outdoors.
Reverse crunches are hard without straining your back or neck. Reverse crunches are safer than upward crunches because they are more regulated. They allow beginners to advanced athletes to improve at their own speed without compromising form or safety.
Reverse crunches work the lower abdominals, obliques, and transverse abdominis. This whole action shapes the midsection and strengthens the core. Adding reverse crunches to your practice can improve posture, lower back discomfort, and athletic performance.
The correct reverse crunch starts with you laying flat on your back with your arms by your sides and palms facing down. Kneel and set your feet hip-width apart on the floor. To stabilize your spine, contract your core and lower back.
Next, exhale and lift your legs off the ground, bending your knees 90 degrees toward your chest. Use your lower abs to start the action, avoiding momentum or swinging. After holding the contraction at the peak, inhale and slowly drop your legs to the beginning position.
Repeat 10-15 times to start and increase as you gain strength and endurance. For a challenge, try extending your legs or twisting to target the obliques.